
Getting Started with Automation Tasks
This guide will walk you through creating your first automation task in AZExecute. By the end of this tutorial, you'll have created a simple task that executes a PowerShell script on a target machine.
Prerequisites
Before creating your first automation task, ensure you have:
• Operator role or higher in AZExecute
• At least one AZExecute agent installed and connected (for PowerShell script steps)
• A stored script (optional, but recommended for this tutorial)
• Any required PowerShell modules assigned to the target agent or its agent group before execution
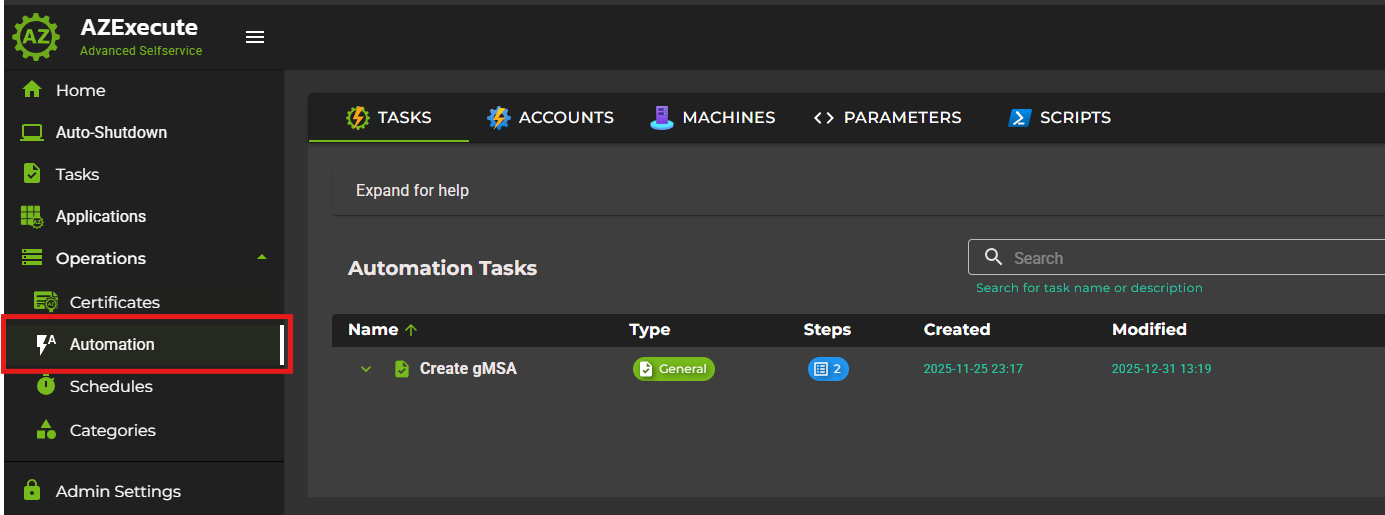
Step 1: Navigate to Automation
From the main navigation menu, go to Operations > Automation. Then open the Tasks tab.
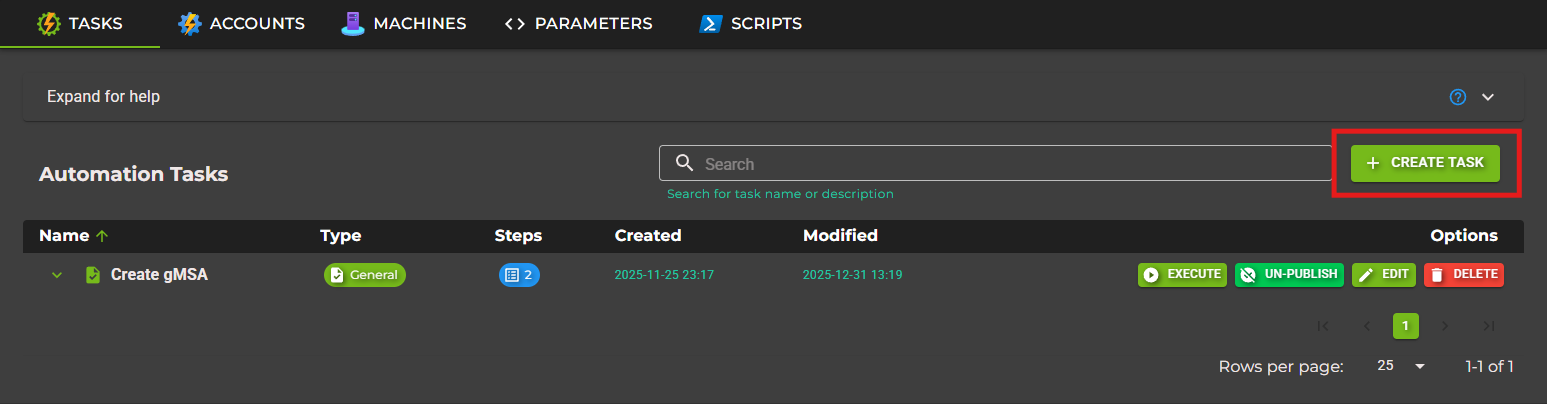
Step 2: Create a New Automation Task
Click the Create button in the Automation Tasks table. This opens the task creation dialog.
In the creation dialog, provide the following information:
Name: A descriptive name for your task (e.g., "Check Disk Space")
Description: Optional details about what the task does
Type: Select "General" for a standard automation task
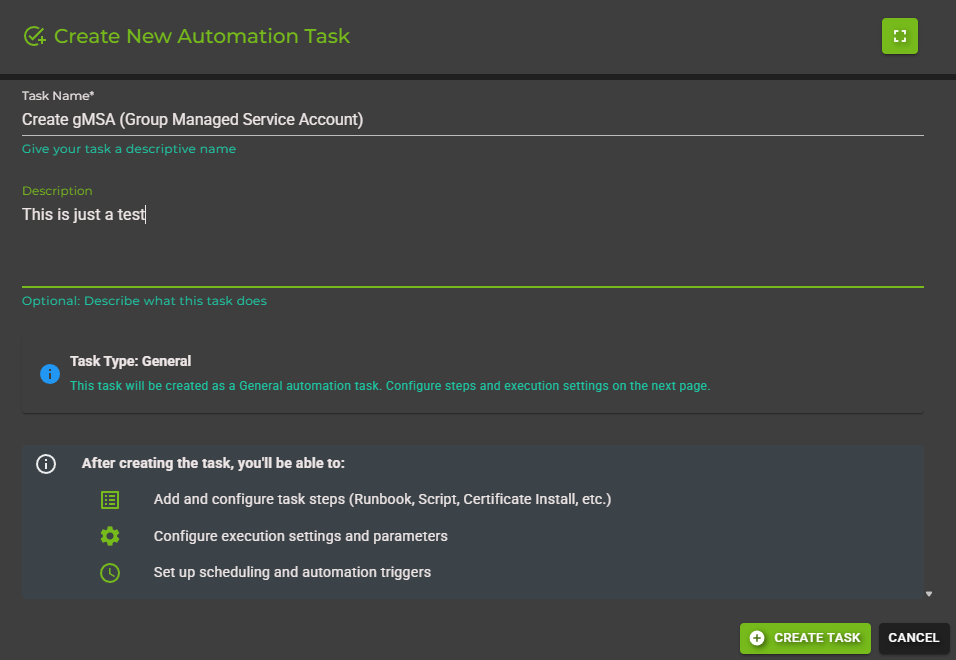
Click Create to save your new task.
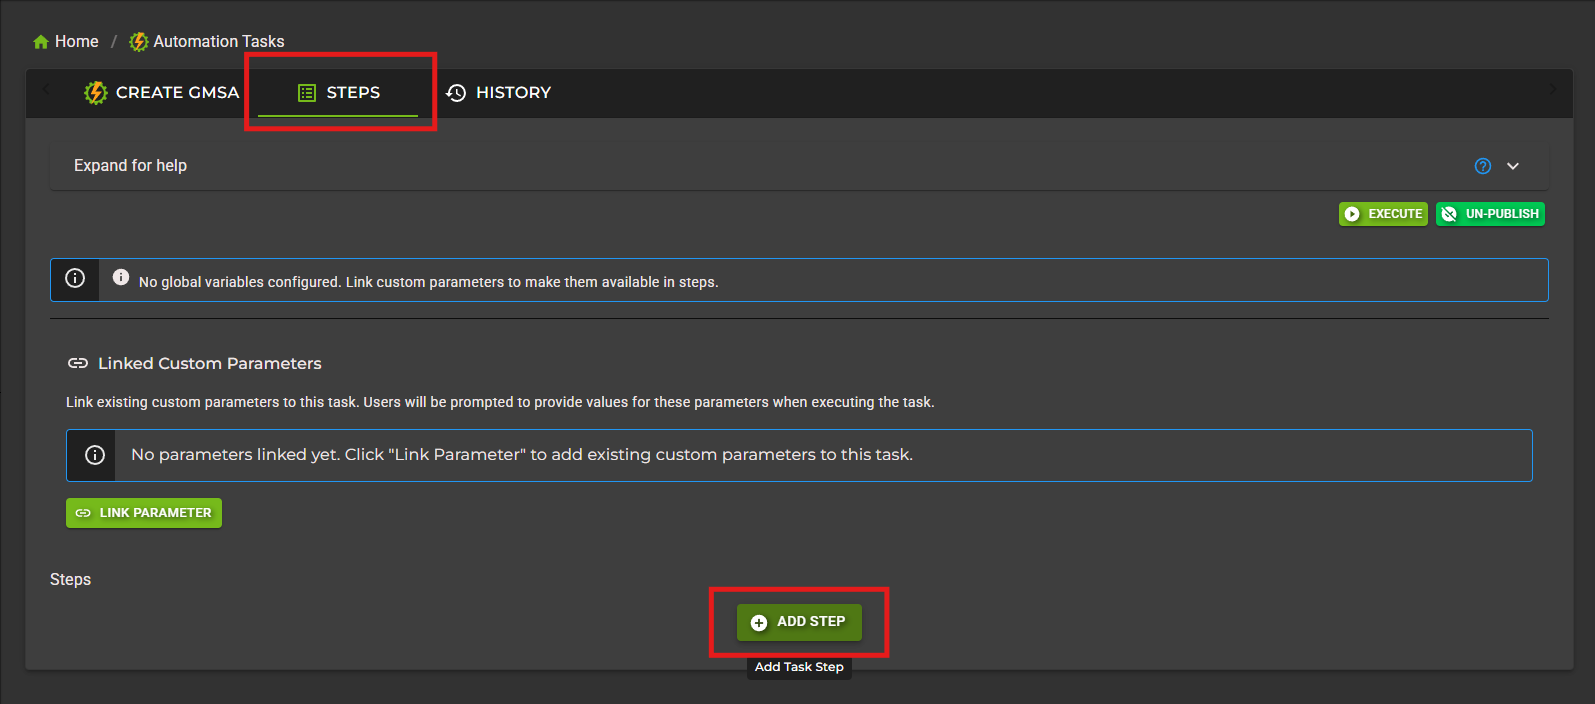
Step 3: Add Your First Step
After creating the task, you'll be redirected to the task configuration page. Click the Steps tab, then click Add Step.
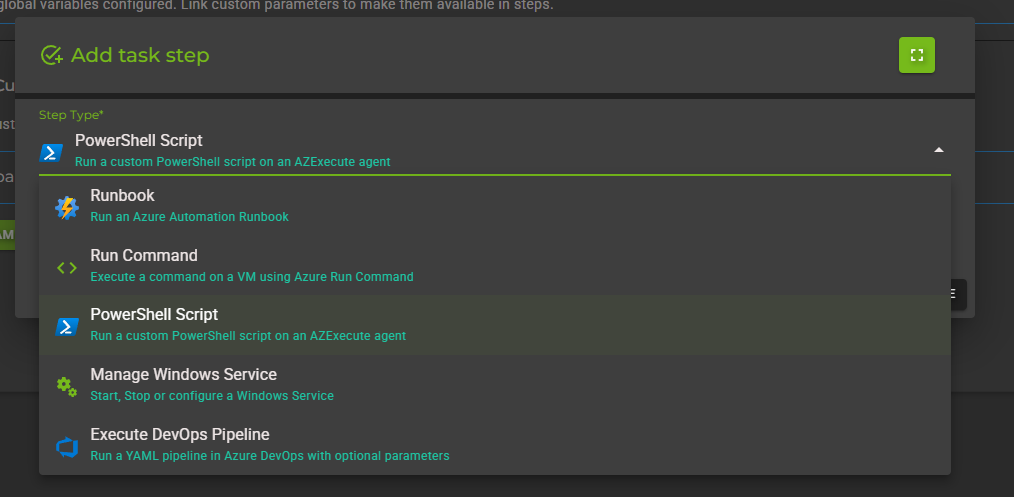
In the Add Step dialog, you'll see all available step types. For this tutorial, select PowerShell Script.
Configure the PowerShell script step:
Select Script: Choose a stored script from the dropdown
Target Machine: Select the AZExecute agent where the script will run
PowerShell Version: Choose between PowerShell 5.1 or PowerShell 7+
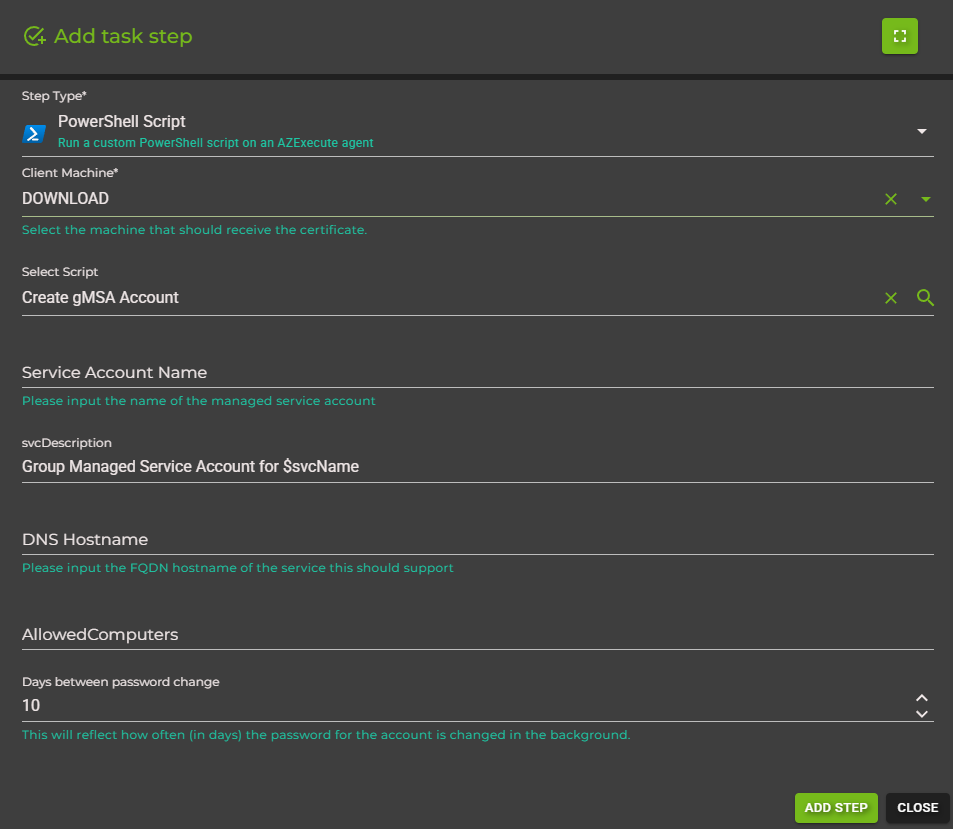
Click Add Step to save the step to your task.
Step 4: Configure Step Settings (Optional)
After adding the step, you can expand it to configure additional execution settings:
Execute in Parallel: Enable this only when the step can run independently of sibling work in the same execution stage
Stop on Failure: If enabled, the task will halt if this step fails
Run with previous group: Use the group header setting when an entire group can start at the same time as the group above it
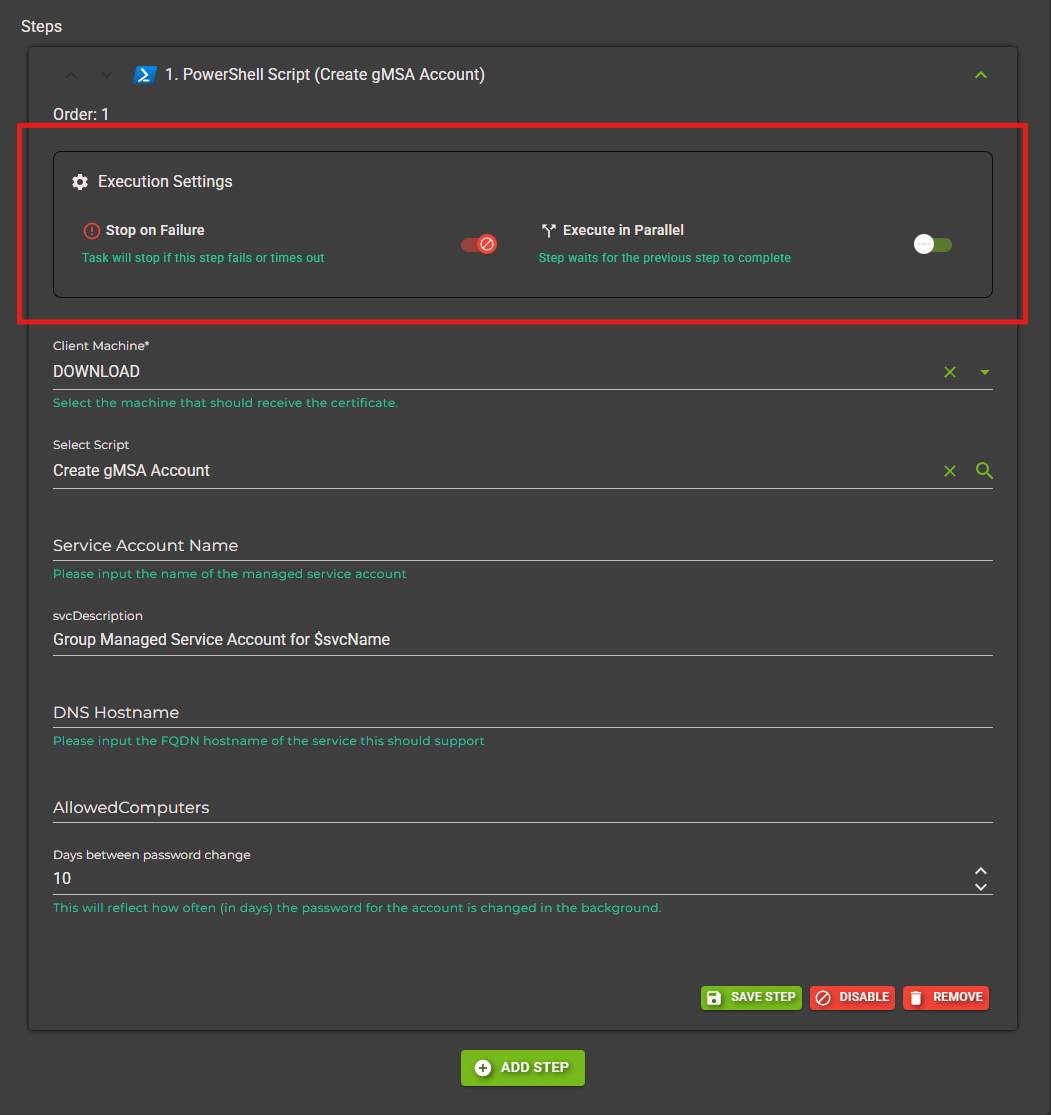
Click Save Step to persist your changes.
Step 5: Execute Your Task
Now that your task has at least one step, you can execute it. Click the Execute button at the top of the Steps tab.

A dialog will appear asking you to confirm the execution. If your task has custom parameters, you'll be prompted to provide values. Click Execute to start the task.

Step 6: View Execution History
After executing your task, switch to the History tab to view the execution results. You'll see:
• Execution start and end times
• Overall task status (Completed, Failed, Running, etc.)
• Individual step results and output
• Error details if any step failed
• Variables created during the run, including values produced by scripts or integration steps

Expand individual execution runs to see detailed step-by-step results.

Next Steps
Congratulations! You've created and executed your first automation task. Here's what to explore next:
• Learn about all step types - Discover Runbooks, Run Commands, Key Vault integration, and more
• Create custom parameters - Make your tasks reusable with user input
• Use global variables - Pass data between steps
• Prepare PowerShell modules - Synchronize shared dependencies to agents before script execution
• Publish tasks to users - Enable self-service automation