
AutoShutdown Single VM Schedule
To have AZExecute handle the stop and start of a specific virtual machine, you need to create a schedule. Follow the steps below to set up your VM schedule effectively.
Before You Start
• Verify you can view the target VM in the Virtual Machines tab
• Confirm your tenant has available schedule capacity based on licensing
• Validate timezone and operational window with your application team
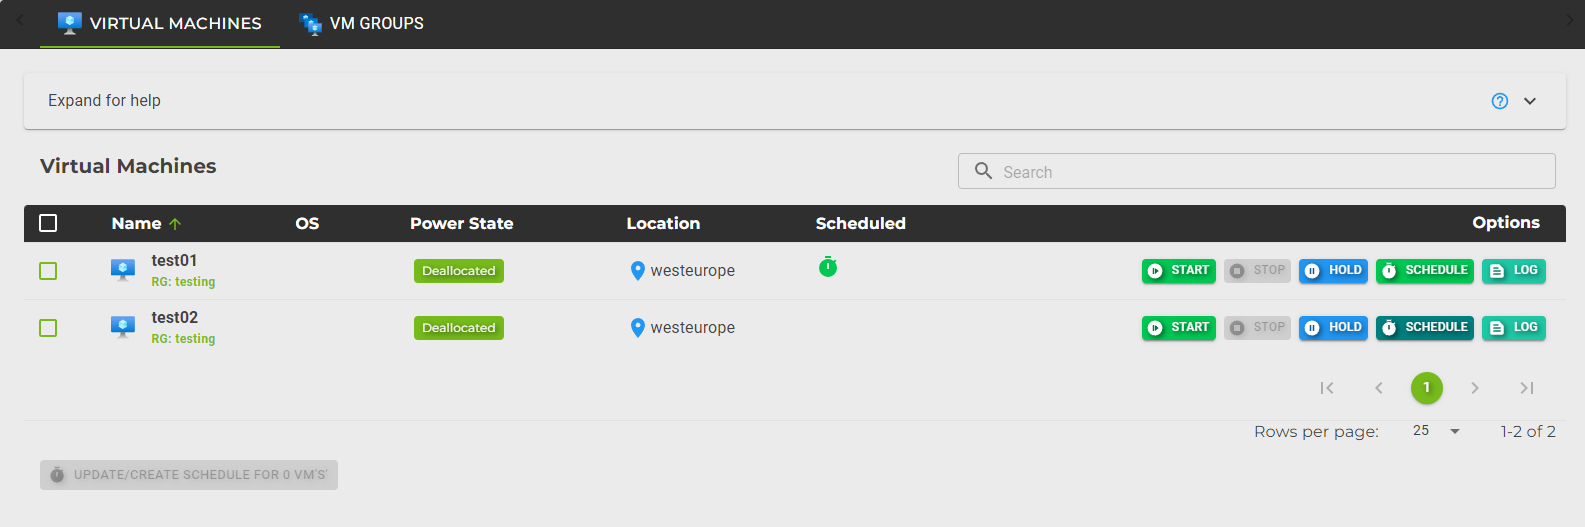
Step 1: Select the VM
Navigate to the "Virtual Machines" tab. Locate the VM you want to schedule and click the "Schedule" button.
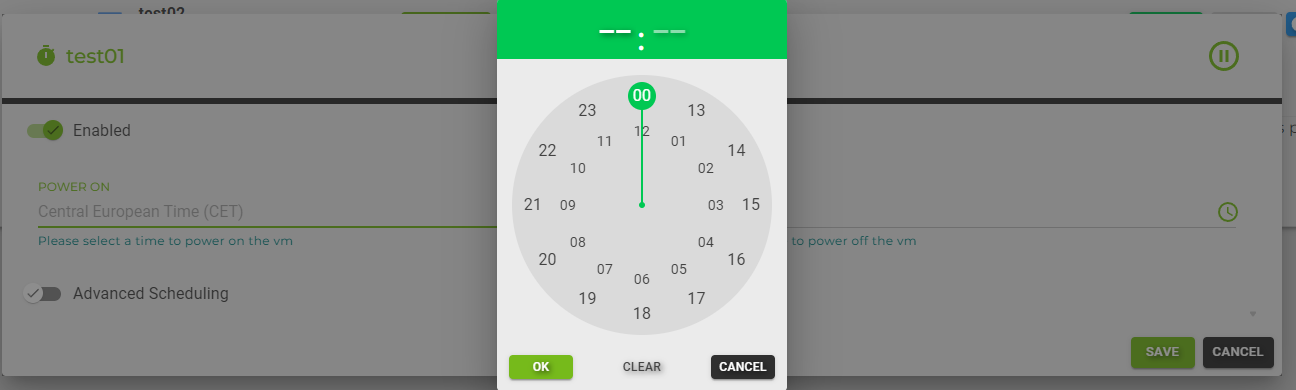
Step 2: Enable and Set Basic Schedule
After clicking the "Schedule" button, an empty schedule will be automatically created for the VM. Enable the schedule by toggling the "Enabled" switch. Set the power on and power off times using the time picker.
Step 3: Configure Advanced Scheduling
If you need different schedules for different days, enable the "Advanced Scheduling" option. This allows you to set specific power on and power off times for each day of the week.
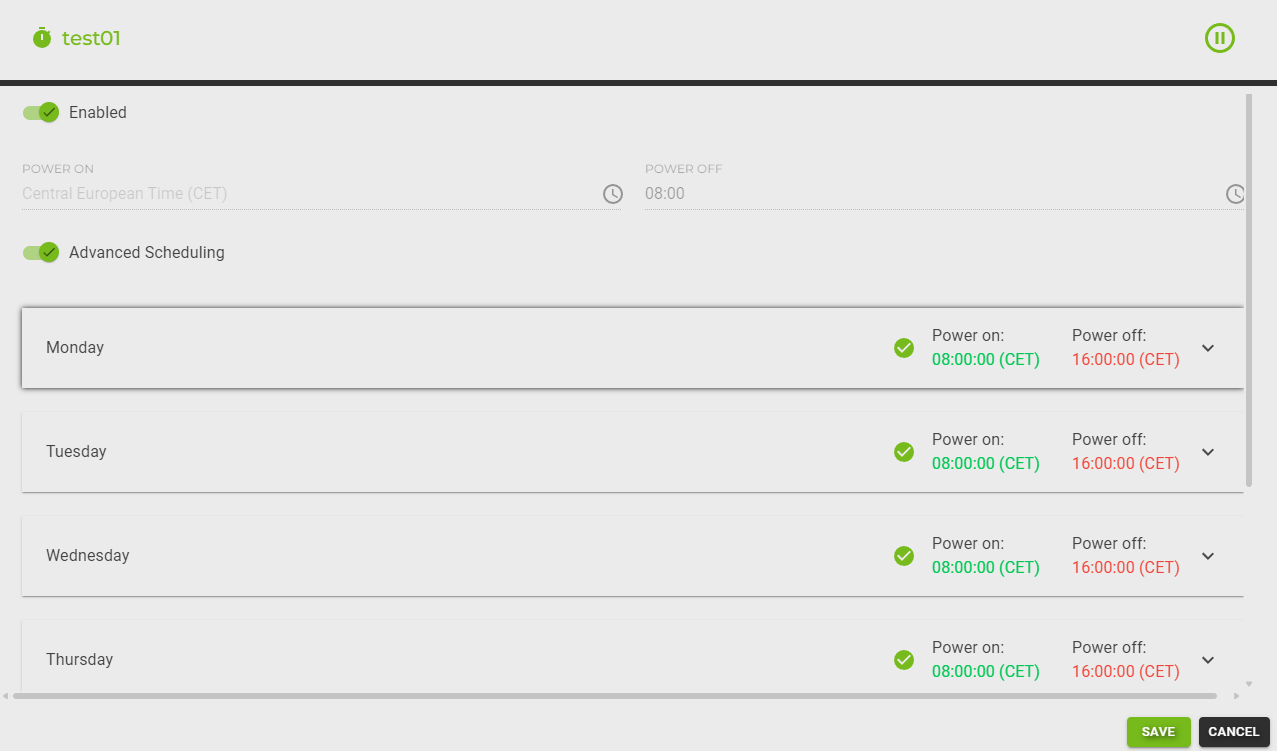
To configure advanced scheduling:
Enable the "Advanced Scheduling" switch.
Expand each day and set the power on and power off times.
Step 4: Save the Schedule
After configuring the schedule, click "Save" to apply the changes. Your VM is now scheduled to start and stop according to the times you have set.
Operational Follow-up: Orphaned Schedules
Use the Orphaned Schedules tab to review schedules that no longer map to accessible VMs. This typically happens when a VM is deleted, moved, or no longer visible due to permission changes.
1. Open Orphaned Schedules and review affected entries
2. Validate whether the VM still exists and should be managed
3. Clean up orphaned entries to keep scheduling state accurate