
AutoShutdown Group Schedule
To have AZExecute handle the stop and start of your virtual machines, you need to create a schedule. Follow the steps below to set up your VM schedules effectively.
Step 1: Create the Schedule
First, navigate to the Virtual Machine section. Click on "Create Group" to start the process.
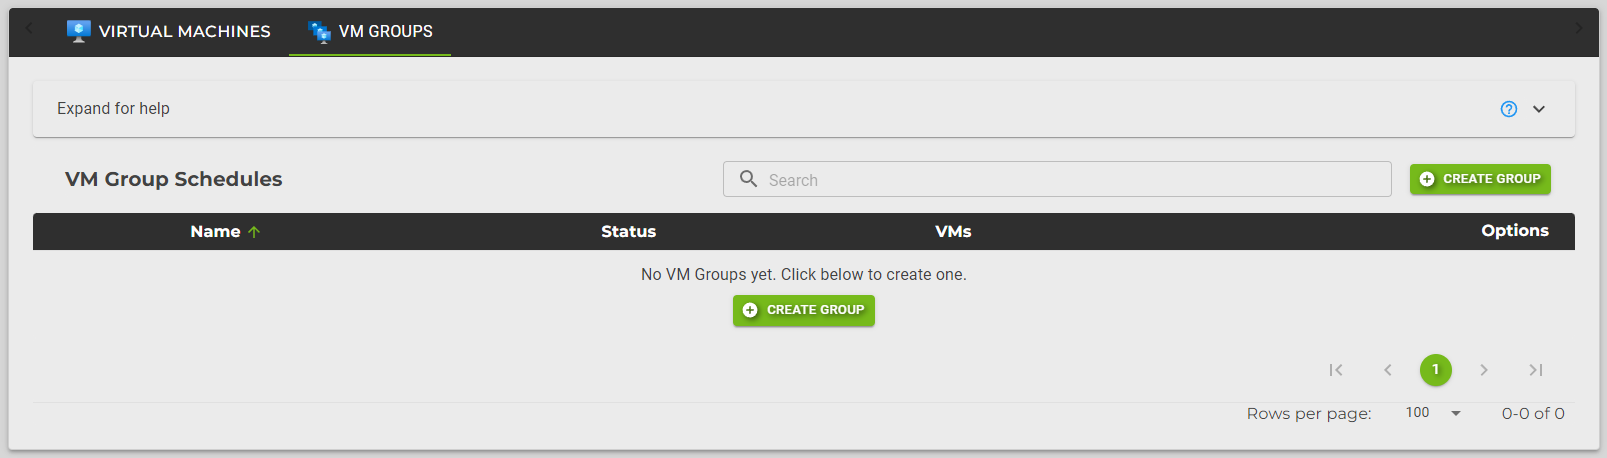
Expand and input a new name for the VM group.

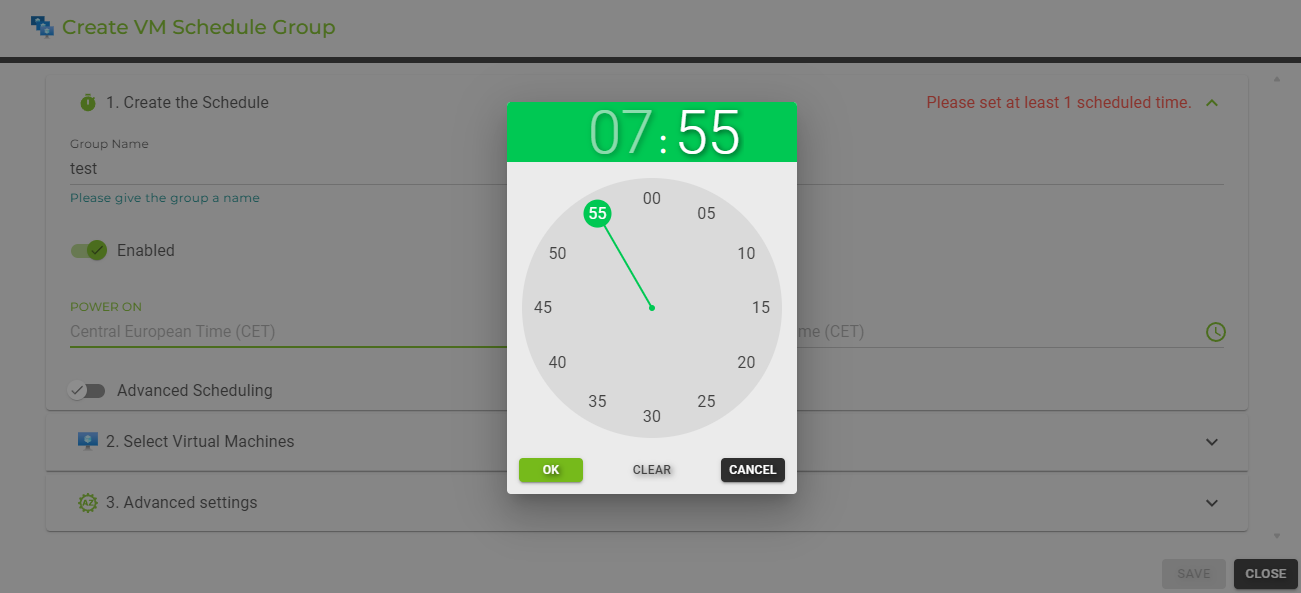
Step 2: Enable and Set Schedule
Enable the schedule and set the power on and power off times. You can use the time picker to set the exact times for the schedule.

Step 3: Advanced Scheduling
If you need different schedules for different days, enable the Advanced Scheduling option. This allows you to set specific power on and power off times for each day of the week.

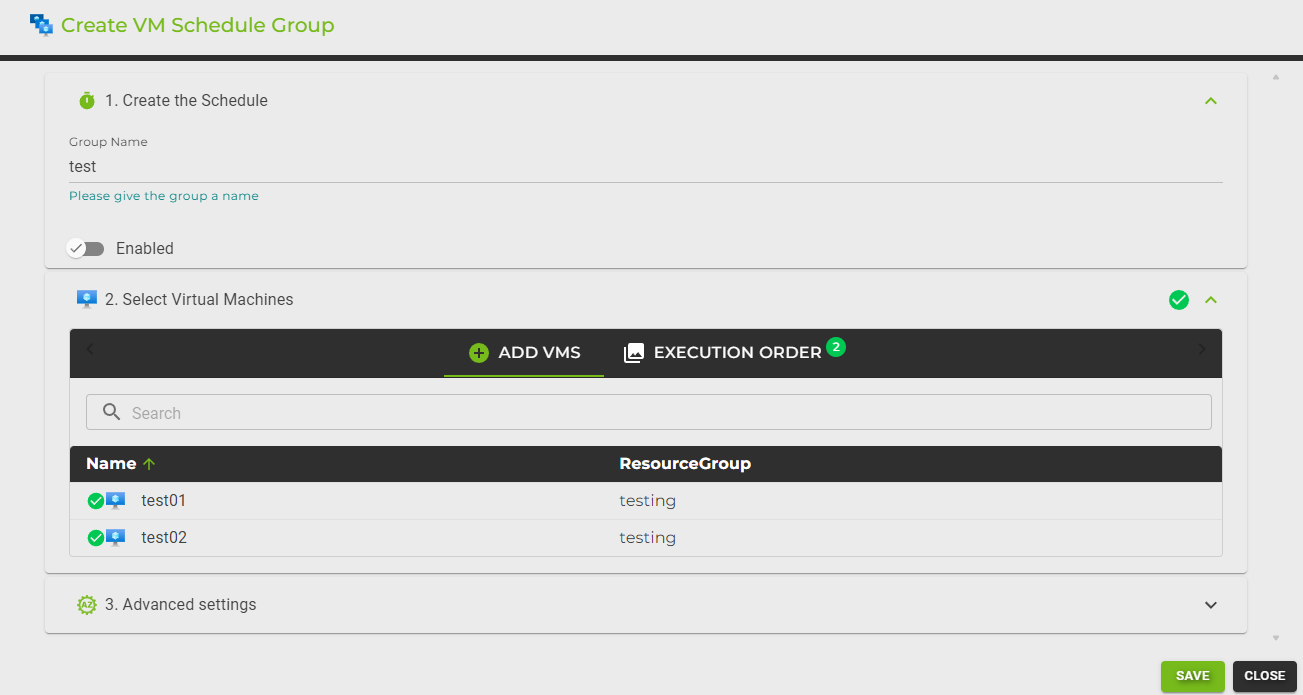
Step 4: Select Virtual Machines
In this step, select the virtual machines you want to include in the schedule. You can and should select multiple VMs from the list.
Step 5: Advanced Settings
Configure advanced settings for your VM group. You can mirror the execution order for shutdown and startup, and defer execution for specific VMs.
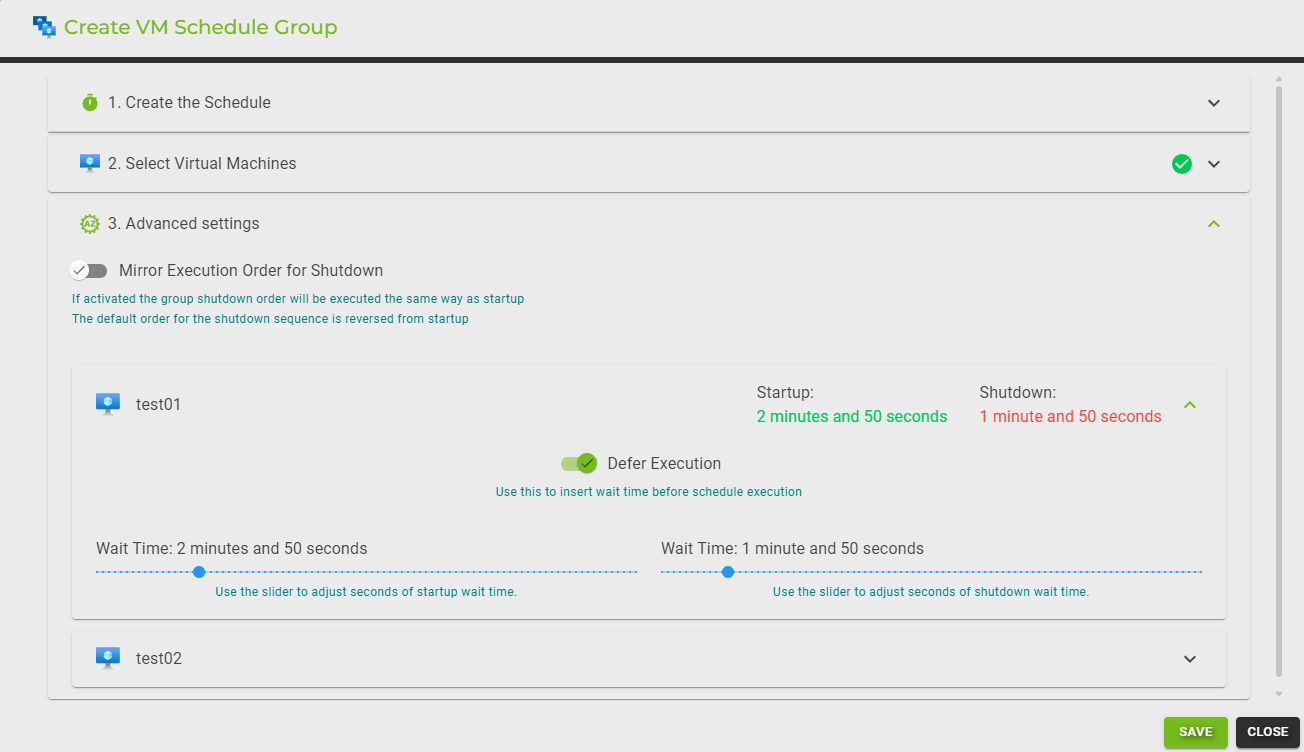
Mirror Execution Order for Shutdown: Activating this option will ensure that the group shutdown order mirrors the startup order. By default, the shutdown sequence is reversed from startup.
Defer Execution: You can defer the execution of specific VMs by setting a wait time. Use the slider to adjust the wait time for both startup and shutdown.